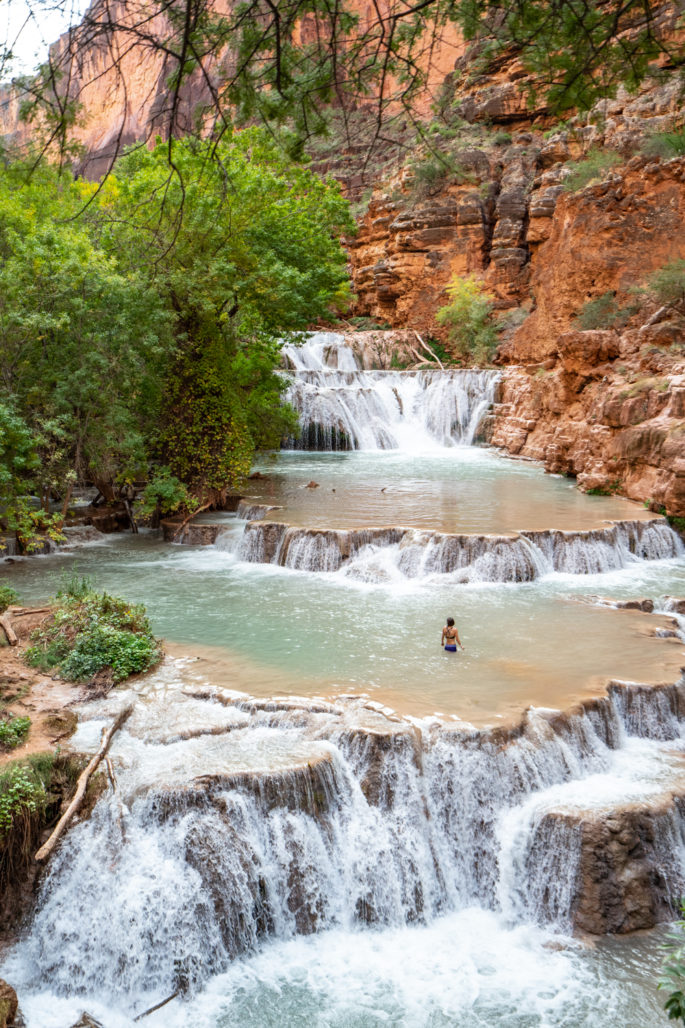
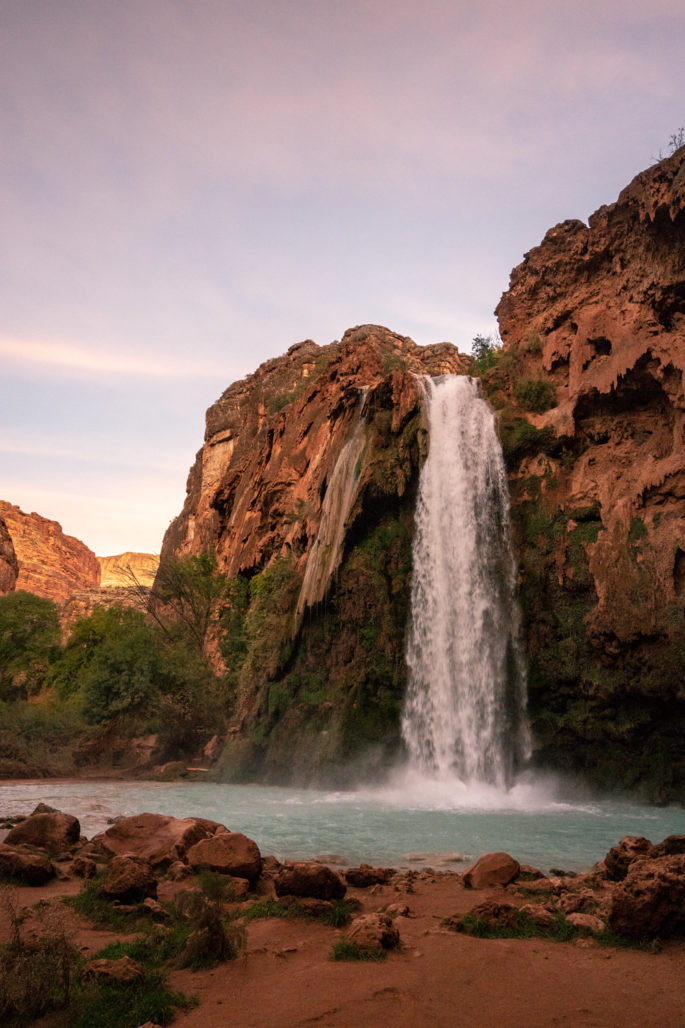
There’s no place quite like Havasu Creek, where ethereal blue-green water cuts through the desert, surrounded by richly colored canyon walls. Havasu Falls and Mooney Falls tower high, rushing over steep drop-offs as the rock appears to melt around it. The insanely beautiful water gets its color from rich mineral deposits in the rock. The high mineral content forms shelf-like waterfall formations all along the creek, a unique motif that occurs all over the area.
The Havasu Canyon area is not part of Grand Canyon National Park, but is part of the large geological formation that is the Grand Canyon. It’s not the main canyon, but a southern arm that feeds into the larger canyon.
I had actually never heard of this spot until after I had moved to Arizona, but it’s a bucket list destination for adventurers near and far. Thanks to the abundance of information and beautiful pictures easily available online, this destination’s popularity has surged in recent years, and there’s no signs of that letting up anytime soon! With that in mind, limiting your environmental impact upon visiting is more important than ever! Please make sure you are aware of and actively practicing outdoor ethics.
Remote destinations like this require a lot of planning, so I’ve compiled a lot of the information I learned before and during my trip this year. Buckle up, there’s a lot of information to cover!
I visited Havasupai in the last week of October this year. Keep an eye out for a separate post about the specifics of that trip and that time of year. This post covers general information on visiting the area.
Note: This post doesn’t include general information on backpacking and gear, but as always, preparedness is non-negotiable! If you need that kind of information, Renee Roaming has a nice beginner’s backpacking guide, including gear recommendations.
Havasupai basics: how to get permits
You are required to obtain permits in order to enter enter Havasupai. Even if you’re strong and could hike the 20 miles in one day, day hikers aren’t allowed. Everyone must have a permit.
Permits for the entire season become available on February 1 at 8a Arizona time on the official Havasupai website. Recently, they established an online permitting system which is way easier than by phone. In 2018, I was on the site right at 8a and there were still almost no dates remaining. Think ahead on what dates you need and be prepared to act immediately. Don’t overthink it, just book anything that meets your criteria, otherwise you could miss out til the next year.
Before booking, make sure you read all the fine print and rules on the reservation website as well as the Havasupai tribe website.
Note that permits are very expensive! For my 3-night permit for 4 people, it averaged out to about $73 per person per night. For 1 person for 1 night, that jumps to $140! Havasupai is not a budget backpacking destination, that’s for sure.
I would recommend booking at least 2 nights, if you can. It’s a tough hike, and you’ll appreciate having the extra day not only to enjoy the scenery and explore, but also to recover.
If you miss the window for obtaining permits, your other option is to go on a private tour, such as Wildland Trekking. Tours are expensive, but the logistical headache it relieves is substantial since they arrange not only permits, but also gear, meals, and transportation.
Note: if backpacking isn’t for you, it’s also possible to stay in the lodge in the village of Supai. Reservations are still extremely hard to come by. Some information on the lodge can be found here.
Getting to Havasupai
The trailhead, Hualapai Hilltop, is located a long way from just about anything. It’s 3 hours from Flagstaff, 4-5 hours from Phoenix, or 4 hours from Las Vegas. If you don’t live in the southwest, it can be quite a long journey to get there!
Directions are very simple and Google Maps works just fine if you enter “Hualapai Hilltop” as your destination. The trailhead is at the very end of the road. Note that parking can be a bit crowded, so you may have to park along the side of the road and walk a little ways to the trailhead. There are composting toilets at the trailhead.
The closest hotels are about an hour from the trailhead. If you’re driving from a larger metropolitan area and want to get closer to the trailhead for an early start, you can stay in Peach Springs, Seligman, or Kingman for the night. These towns don’t really have any significant attractions and aren’t necessarily destinations unto themselves.
The best (and worst) times to go to
Since I live in northern Arizona not too far from Supai, I have a lot of first-hand experience with the seasonal weather patterns around here.
I would highly recommend avoiding July and August as those are monsoon season, which means flash floods. The floods are not only dangerous, the frequent (but brief) thunderstorms could make for a kind of miserable afternoon. Besides that, those months are crazy hot, which would make any hiking a pretty miserable undertaking. June also tends to be blazing hot, so I wouldn’t recommend that as my first pick either. That said, if you’re willing to get up very early to avoid the heat and you love soaking up hot weather and swimming all day, the summer might just be for you. Note that there’s no daylight saving time change, which means in summer, the sun rises as early as 5a.
The time of year I would recommend most would be the shoulder season: September, October, April, and May. Note that shoulder season weather can be quite variable here in northern Arizona, but personally, I’d take the shoulder season gamble over the guaranteed swelter of summer.
If you like cooler weather and want to raise your chances of peace and quiet, the fringes of the season in months like February or November are potentially great options. Even though these months are cooler, it still doesn’t get that cold by backcountry standards. Average highs in November and February are in the 60s, with lows dipping into the 30s. That’s average though, so it’s still possible for it to be colder.
The hike in (and out)
If you’ve gone through the battle of obtaining permits and traveling to the trailhead, you’ve already won half the battle! But the hike in is still a challenge to contend with.
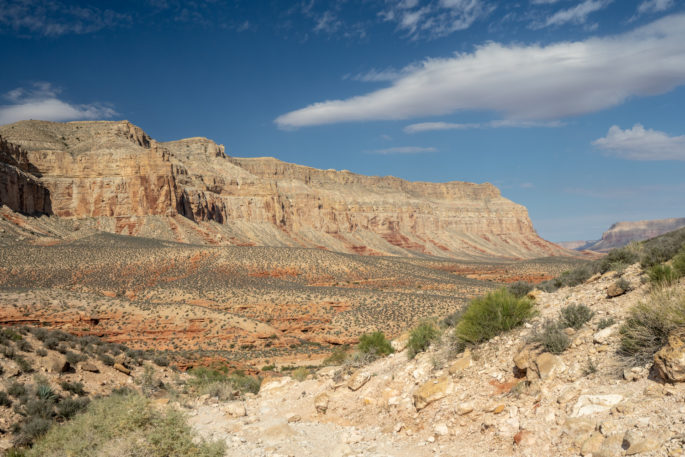
This hike doesn’t warm you up, the hardest part is right after the trailhead. You drop down a series of steep, rocky switchbacks into the wide open canyon. It’s true canyon desert here: desolate, dry, and sun-washed. This section of the hike can be quite sunny and hot later in the day.
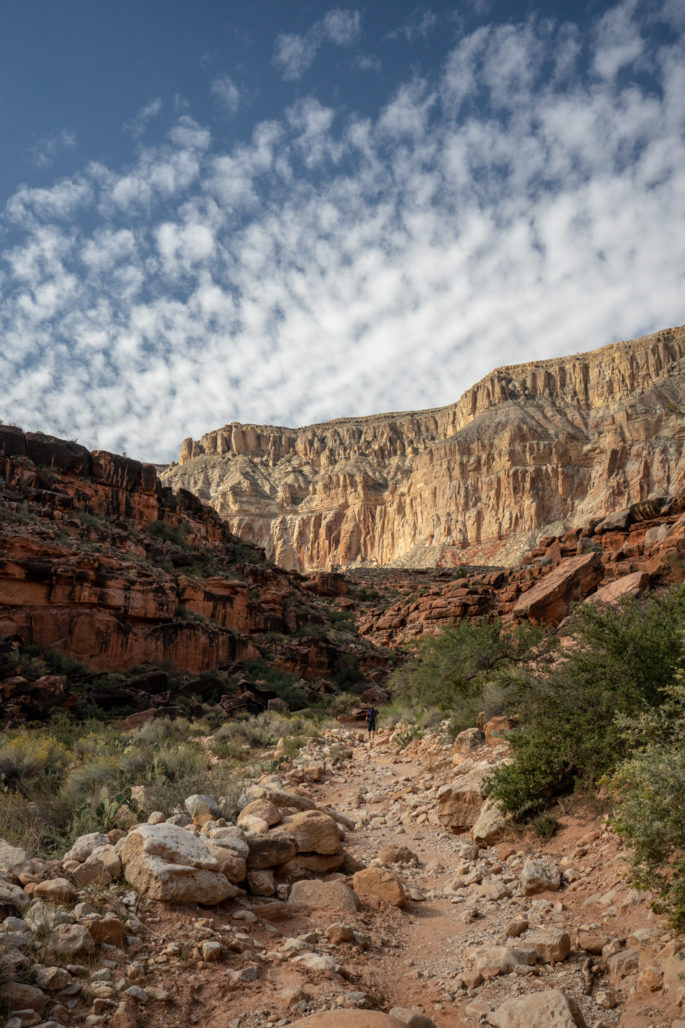
The grade gets a little less intense as you finish the switchbacks and continue into the canyon, but stays steadily downhill. The hike is constantly rocky and gravely, not packed dirt.
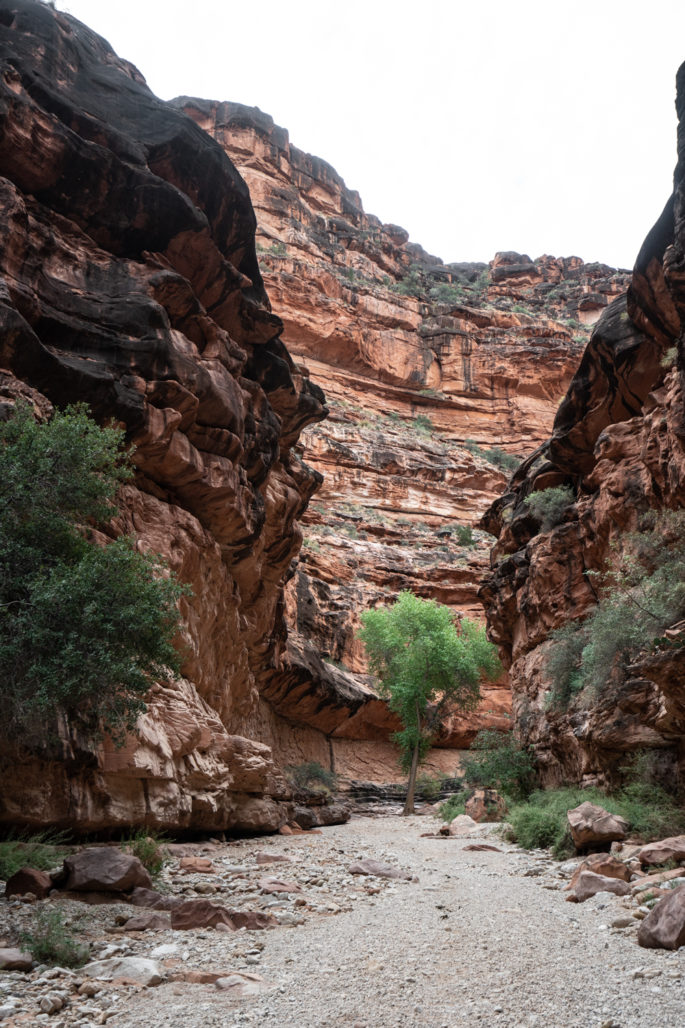
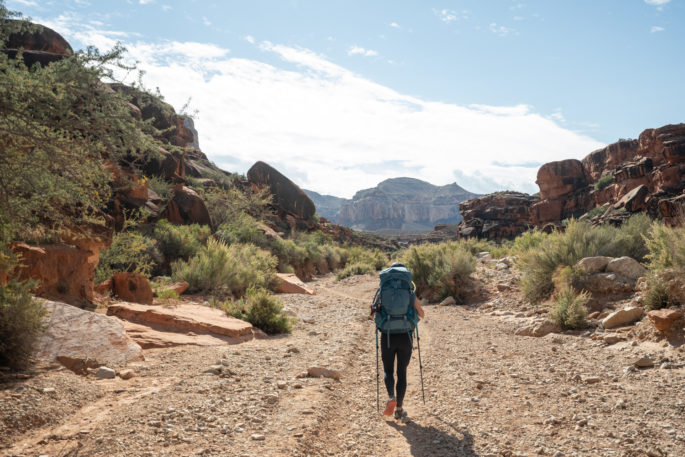
The trail gradually narrows, and eventually you’ll follow a wash down for several miles and trade the light, sandy tones of the rocks for richer reds. For the most part, the trail is quite wide, as pictured here. Although some people say the hike into Havasupai is boring and not scenic, I actually thought it was prettier than I expected.
Watch for mules and horses, as they have the right of way and can sometimes come up behind you quickly. Move to the side of the trail (the canyon wall side, if you’re on a steeper part) to allow them to pass. There is a lot of mule traffic, so expect to have to yield quite a few times throughout the hike.
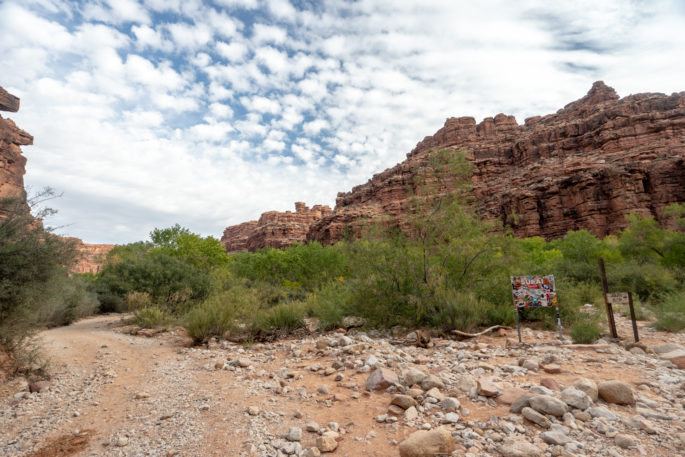
You’ll reach a sign for Supai, indicating you’re starting to get close. Shortly after this sign, you’ll get your first glimpse of Havasu Creek. It’s such an enchanting sight that pics can’t quite prepare you for.
From there, the trail gets a bit more lush and treed (by Arizona standards, anyway) and you’ll hike a little further before arriving at Supai village. It’s a very surreal experience to hike 8 miles through the desolate nothingness of the edges of the Grand Canyon, only to find yourself in the middle of a (very small) town inhabited by a couple hundred residents. It’s important to be respectful of residents, which includes not taking photos of residents or their homes.
When you get to the village Supai, you’re required to stop at the check-in building in the middle of the village to present your permits and receive your tent tag and wristbands for your stay. Don’t cut your scheduling too close, because checking in can take some time since you may have to wait on other guests.
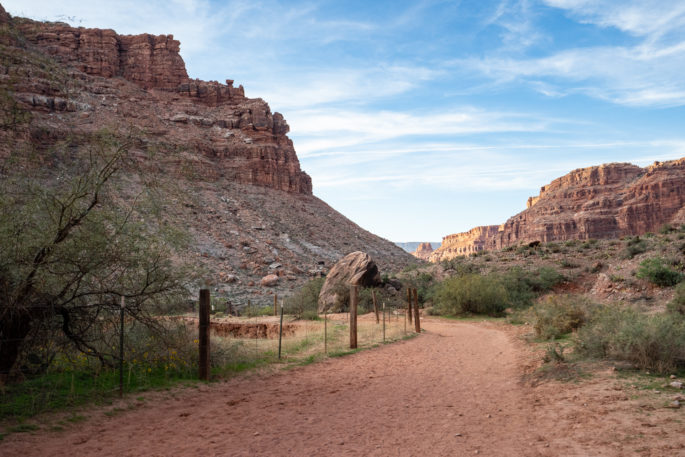
After checking in, you’ll continue through the village and down the 2 miles to the campground. From here, the trail is wide and sandy all the way to the campground. There’s a couple of frybread huts along the way if you want to stop for a snack (another unusual occurrence on a 10-mile hike!).
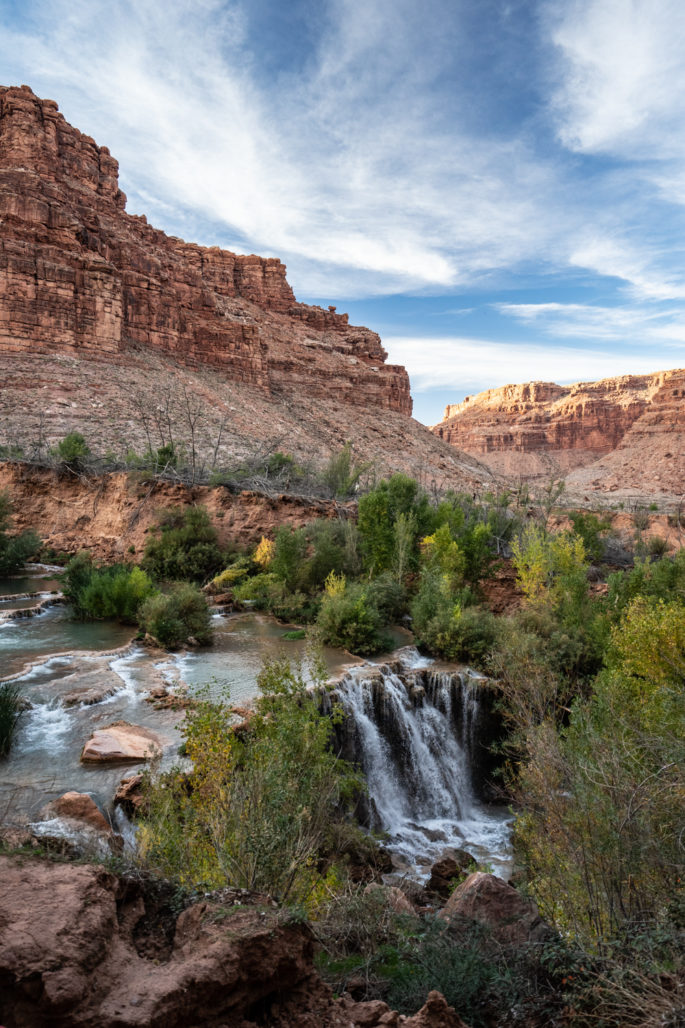
Before arriving at the campground, you’ll re-join the creek, catching glimpses of Navajo Falls and Fifty Foot Falls on your left.
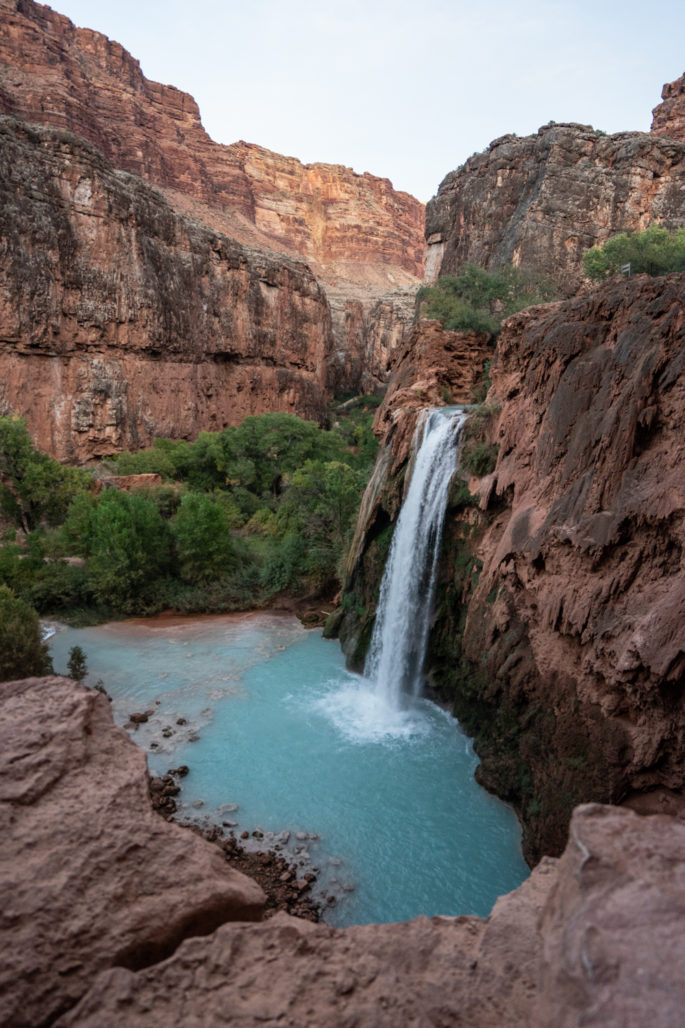
Continuing on a bit further, you’ll arrive at the incredible Havasu Falls. The canyon walls start to close in and the trail drops steeply down alongside the falls, which appear on your right. The higher vantage point frames everything perfectly and makes for great photo opps. Taking a picture here is basically a requirement! Hike down a little further and you can access the base of the falls for a swim and more photos.
After you pass Havasu Falls, there’s one final downhill jaunt to the start of the campground. Add one more flat, easy mile to your hike if you’d like to camp at the end of the campground closer to Mooney Falls.
The hike out is the same, but much more challenging since it’s uphill. The shallow uphill miles after Supai are not too awful since the grade is fairly subtle, so you can crank through those miles at a relatively faster pace. The last mile or two will take you a little longer, since it gets very steep and is probably hotter by that point.
In total, the elevation change is about 2500 ft each way. Around half of that is covered in the first/last 2 miles near the trailhead.
Alternatives to hiking
Personally, I think hiking in and out adds more to the experience, but it’s nice to have backup options in case of injury or other emergency issues.
Helicopter trips cost about $85 per person each way and only takes a few minutes. That said, they do not run every day, so plan your trip accordingly if you intend to utilize a helicopter.
If you’d like to hike but a fully loaded pack is a bit much for you, you can pay for a pack mule to transport your gear between the campground and the trailhead. According to the Havasupai tribe website, mules are $132 one way for 4 bags. If you are hiking with a group, you can split the cost per bag.
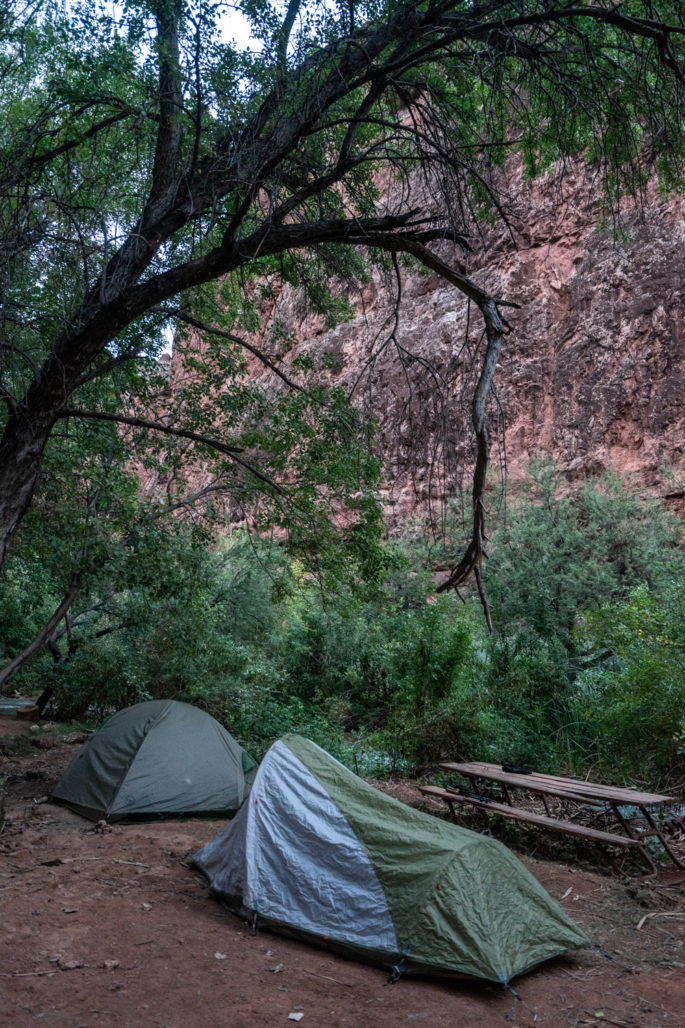
Arriving at camp
Even though you (probably) hiked a long way in to get to the Havasupai campground, it’s not exactly hardcore backcountry camping. Thanks to the helicopter and mule options, it’s much more accessible than most backpacking areas, and people sometimes bring in an incredible amount of gear. In a way, it’s a bit like the Disneyland of backpacking.
The campground is about a mile long and has a capacity of 200 people, and you can definitely feel it. Don’t expect solitude here!
The canyon walls tower hundreds of feet overhead, boxing in the campground. The high walls keeps the campsite more shady and cool than I expected since the sun isn’t constantly beating down on you.
Campground amenities include 3 composting toilet huts (with multiple stalls each) spaced out along the campground, a water source at the beginning of the campground, and picnic tables at the camp sites. You might even be able to find a rake head to use to smooth out the ground where you’ll pitch your tent. Bring your hammock, because there are tons of hammock-friendly trees to set up in.
Note that campfires are not allowed at the campground, so plan to use your camp stove for cooking. Alcohol and drugs are also prohibited and comes with steep fines if you are caught.
The toilet facilities were stocked with toilet paper, and generally not smelly (though that might be more of an issue in the height of summer), and overall much nicer than expected. The toilet at the very end of the campground near Mooney Falls seems to be the nicest, since this one probably gets the least use.
You can get water from a spring marked near the beginning of the campground. Some sources still recommend treating this water, but most people don’t seem to, including me. I did, however, bring backup water treatment (always a good idea!) in case there was an issue.
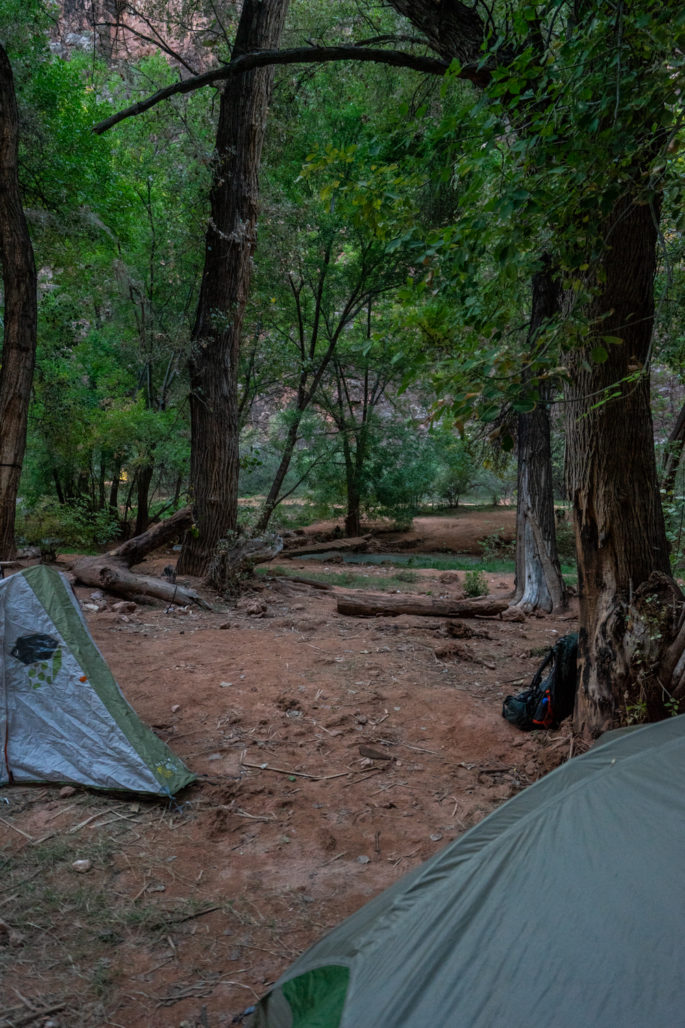
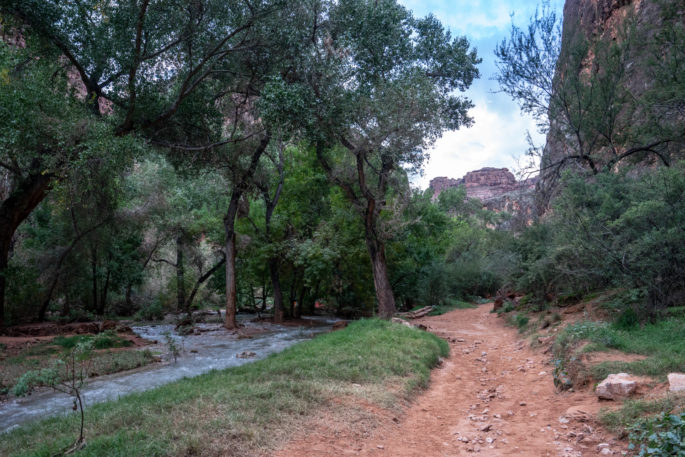
A little ways in, the creek splits, and there are a number of campground in between the braids of the creek. If you’re willing to cross some sketchy-looking footbridges, you can get more privacy and quiet on the campsites on the other side of the creek since almost no one walks by your campsite.
The second half of the campground has a totally different feel than the first half. If you want to be close to the creek, go a little further, as the early campsites don’t sit right next to the water. Personally, I much preferred the campsites that are further in.
What to do in Havasupai
At camp, the creek provides plenty of opportunities to splash around. Set up your hammock and spend a few hours just relaxing. Walk to the end of the campground and marvel at Mooney Falls–you can get great views of the falls without doing any serious hiking.
The water running through Havasu Creek stays around 70 degrees year round. Even when it’s not especially warm outside, the water isn’t icy cold, which makes wading around pretty tolerable.
If you want to leave the campground and explore further afield, these are your options.
Nearby waterfall exploring (mostly easy)
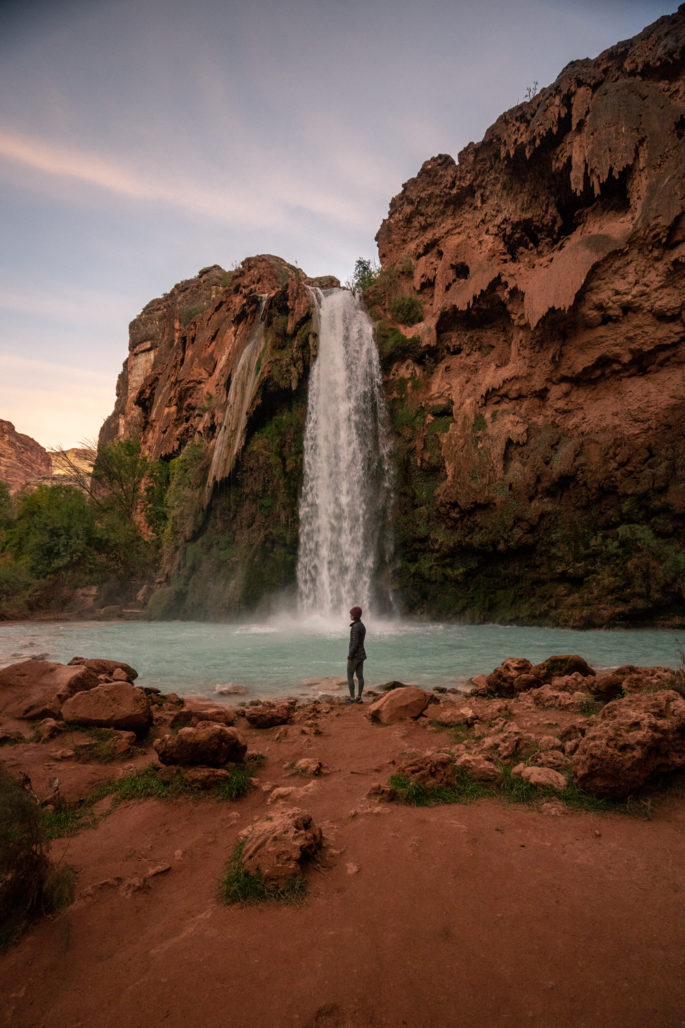
As you walk down toward camp, you’ll pass Navajo Falls, Fifty Foot Falls, followed by Havasu Falls. Havasu Falls is the most famous, iconic site in the area, and is well worth spending some time there. It’s a great place to catch sunset!
All of these falls are close to the trail and are great options for some low-key exploring, especially if you’re recovering from the hike in. The hike back up to Navajo and Fifty Foot Falls is a bit steep, but not too far.
If you want to swim and/or take photos, you could easily spend hours at any or all of these falls.
Hike back to Supai village (mostly easy)
If you’re craving some of the comforts of civilization, you can walk the 2 miles back to the Supai village and have a hot meal at the cafe or buy some food at the store. If you don’t want to go all the way back, you can often pick up some food at one of the frybread huts along the trail, if they’re open.

Hike down Mooney and on to Beaver Falls (moderate but technical)
It’s about 2 miles each way from the end of the campground to Beaver Falls. Add another mile each way if you’re starting from the beginning of the campground.
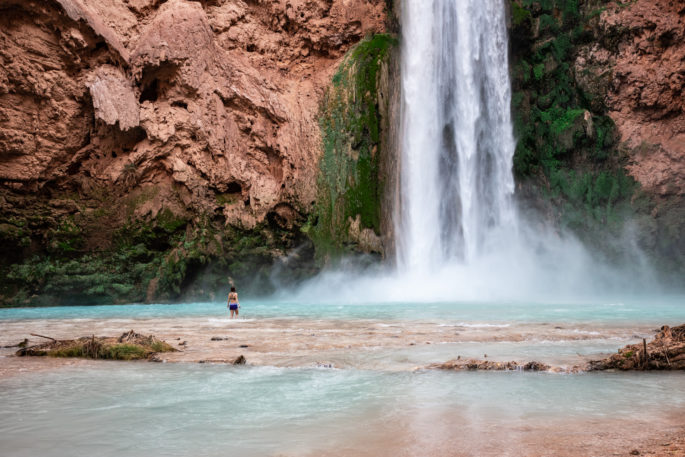
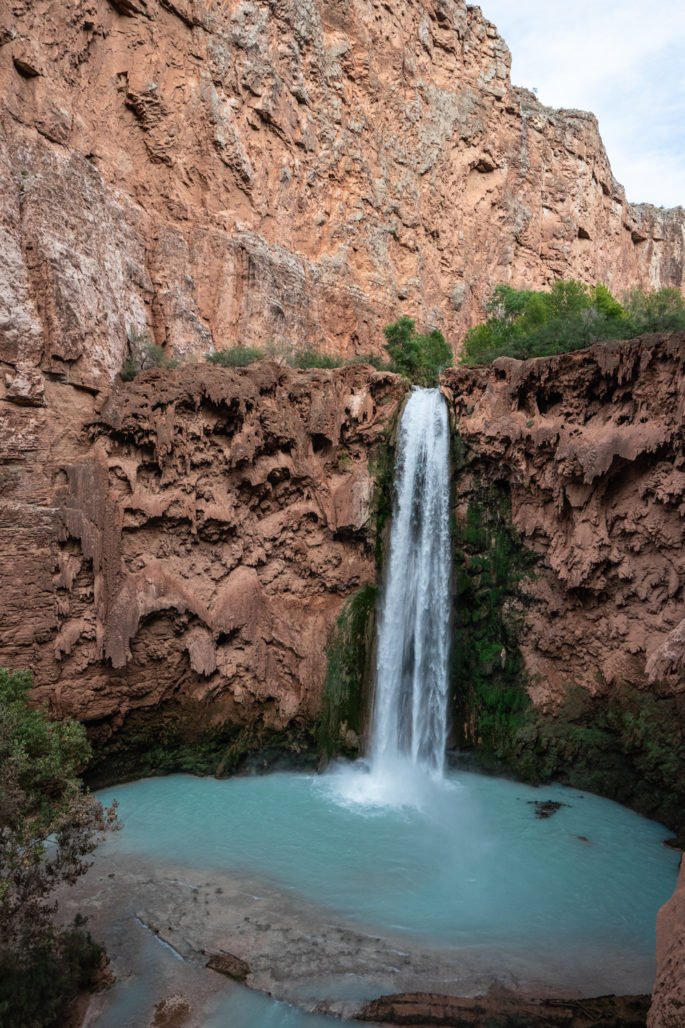
Mooney Falls is the tallest, most dramatic waterfall of the bunch. Standing in the pool below the falls and feeling its power is simply amazing. Mooney and Havasu Falls are really confusing from photos since they look virtually identical. But once you visit, you’ll never mix them up again.
The descent from Mooney Falls is no walk in the park, but it’s doable for most hikers. You’ll scramble down a steep section, walk through a couple of tunnels (opened up with dynamite), and finally descend a set of ladders to the base of the falls. If you’ve hiked something like Angel’s Landing in Zion, you can handle Mooney. There’s only a short section that’s a bit challenging where it’s very steep. You’ll be using hand holds and chains to steady yourself up and down. Some people recommend gloves to protect your hands, but they’re not absolutely necessary.
If you’re scared of heights, Mooney might shake you up a little bit, but the good news is you’ll only have to deal with the heights for a few minutes. If you don’t feel comfortable, there’s no shame in turning back. There’s plenty to explore upstream!
Take note that if you don’t leave early, there’s a good chance you’ll be waiting in line for a long time to descend Mooney Falls. The steep climb slows people down and creates quite a bottleneck. If you leave on the later side of the morning, you might encounter delays of 30+ minutes.
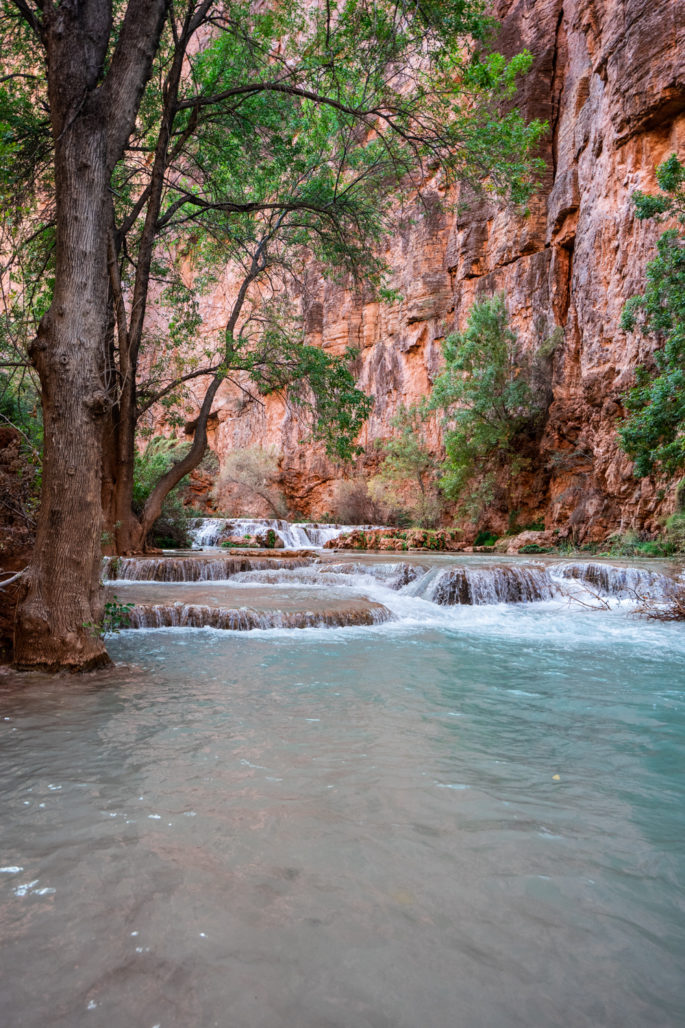
The hike to Beaver Falls is beautiful. The creek keeps the area lush, and the stream cascades over endless tiny waterfalls alongside the trail.
The trail through the canyon encounters several creek crossings. When I say “creek crossings”, I don’t mean casual rock hopping. To cross the creek, I was wading through 20 ft wide crossings with water up to my thighs! (I took the above photo standing knee-deep in water.)
Sometimes the path to cross is clear, other times it requires a bit of standing on the bank making faces and trying to scheme up a way to avoid waist-deep water. Waterproof shoes won’t help you here since the water is far too deep. If you have expensive electronics with you, consider bringing a dry bag just in case you end up in deeper than you expected. There are 3 or 4 crossings before you reach Beaver Falls. I noticed there were places I could see a trail on the other side of the creek, so there’s probably more than one path to get downstream. You’ll also find quite a few picnic tables scattered along the trail which make nice spots for a rest or lunch along your hike.
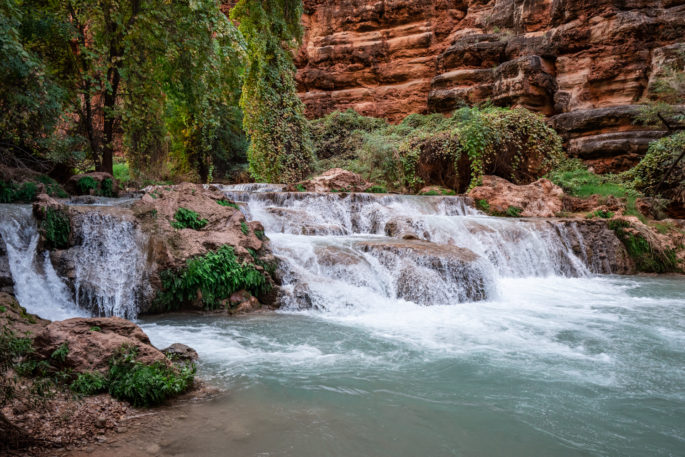
There was a small cascade of waterfalls that looks like Beaver Falls that several hikers assumed were the falls themselves, but don’t be misled! After the fake Beaver Falls and right before you arrive at the real thing, you’ll traverse some more technical terrain. This includes steep sections with some short ladders. They’re not nearly as intense as the descent down Mooney Falls, but they’ll slow you down. First, you’ll climb up some ladders and get to a bluff overlooking the real Beaver Falls.
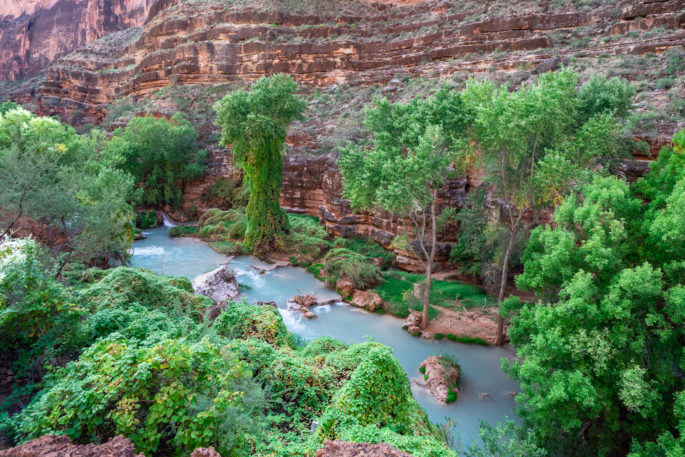
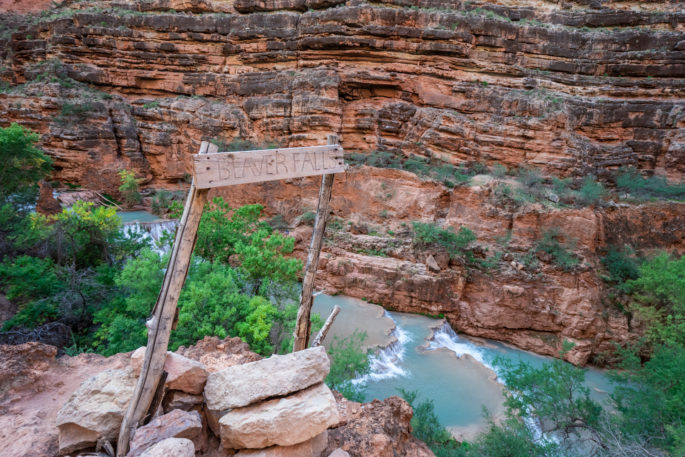
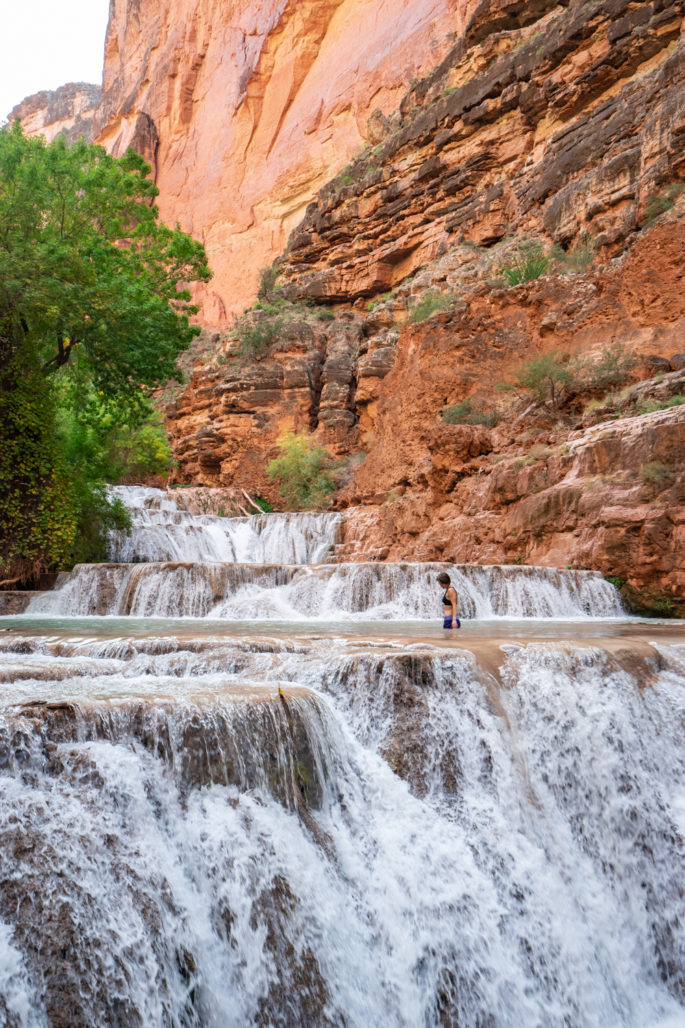
There is a sign here marking the falls. From here, descend a little ways to the falls themselves where you can access the water and take more photos.
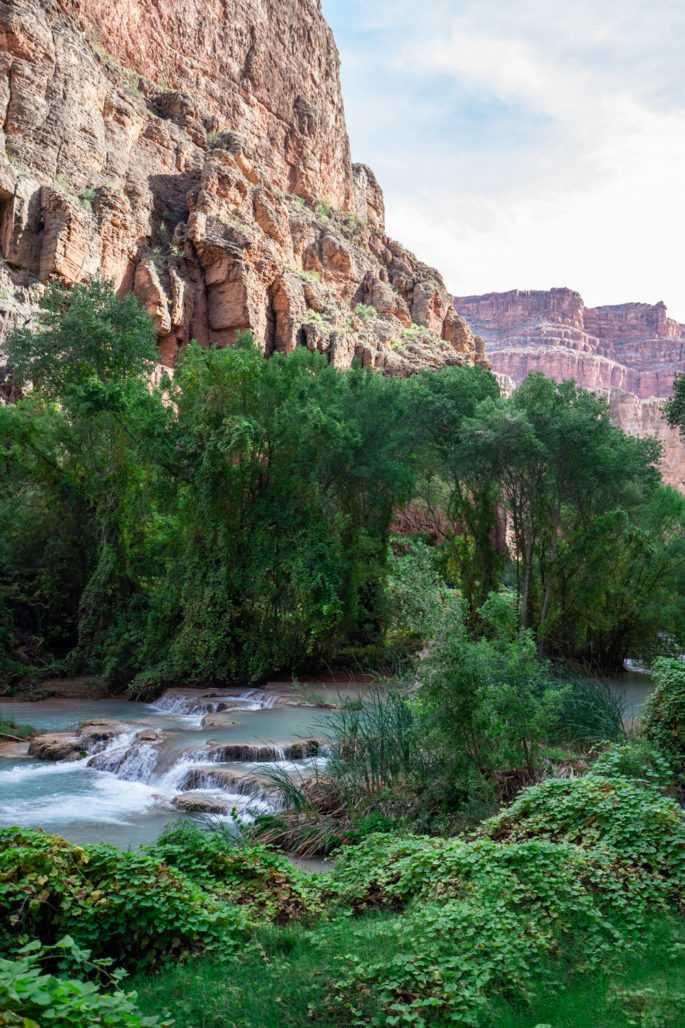
Hike to the Colorado River (strenuous)
For the most ambitious adventurers, you have the option to hike all the way to the confluence, where the Colorado River and Havasu Creek meet. I wasn’t able to do this hike on this trip, but I did a lot of research on it beforehand. It’s about 8 miles each way, but the trail isn’t always smooth sailing. There are quite a few ups and downs and many creek crossings–it’s not a straight shot.
This hike starts out the same as the hike to Beaver. So, everything described above also applies here. You’ll pass Beaver and continue on to the right for several miles. You’ll see a sign as you pass into Grand Canyon National Park and you’ll cross the creek a few more times. Starting early is especially important for this hike due to its length. Bring tons of water and snacks for the long day ahead.
The trail follows the canyon, which means it’s fairly difficult to get lost. The only part where you might go wrong is just after Beaver Falls. Keep to the right of the canyon, and if you come across the sign for the national park, you’re on the right track. Just keep walking downstream!


Absolutely stunning pictures and very well written (as usual) making for another enjoyable read of another remarkable hiking experience. Through your pictures and words I am able to see such breathtakingly beautiful nature that I would not otherwise see if not for your sharing, thanks!
Thanks! It’s a pretty magical place. :)
This is an amazing ultimate guide, so complete. I love hiking but with no scary drops, I really need to work on that as I know I am missing out on exciting adventures. Havasu Falls is so Beautiful. My wife would love this. This looks just like the thing they would truly enjoy. Anyway, love your beautiful photos. Thank you for this fantastic review!
Thanks, Suzanne. This is perfect recon as my girlfriends and I get ready to head to Havasupai in October. Thank you for spending the time writing it and posting such beautiful photos.