Many US sellers are hesitant to sell to Canadian buyers because shipping across the border seems confusing, and it’s easy to worry you’re going to do something wrong. But in reality, it’s actually quite simple! Everything can be done online at home: label, customs, and payment information, so all that’s left to do is put it in the mail. Here is a step-by-step guide–with screenshots!–on how to ship from the US to Canada inexpensively, and with tracking to boot!
[Note: all pics throughout the guide can be clicked on to make them larger if you need to see more detail]
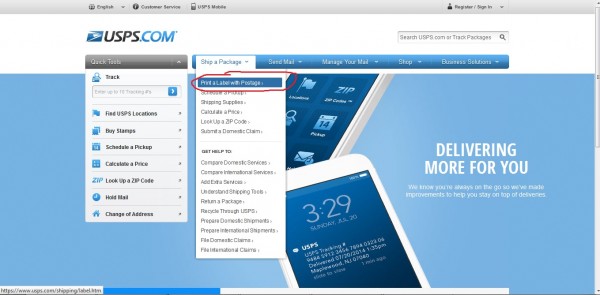
First, you need to go to the USPS website:
Click on “print a label with postage”. You’ll be prompted to log in. If you don’t already have an account at USPS.com, you should seriously get one because it’s useful, not only for selling but also for mailing birthday gifts and other misc postage needs.
Note that when shipping to Canada, it is always best to ship USPS. FedEx, UPS, and other couriers charge steep import fees to the buyer upon delivery, while the USPS does not because of agreements between Canada Post and USPS. If you ship one of the other ways, you’ll very possibly have an unhappy buyer on your hands. Plus, USPS is generally cheapest for you, the shipper, anyway.
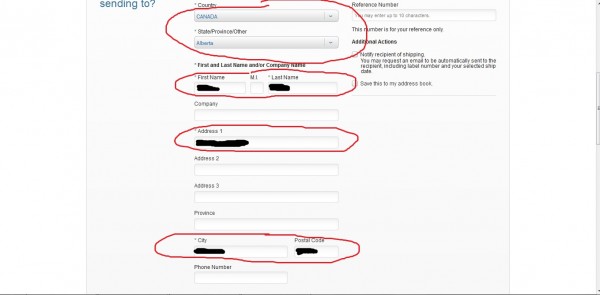
Enter the address info. Self-explanatory.
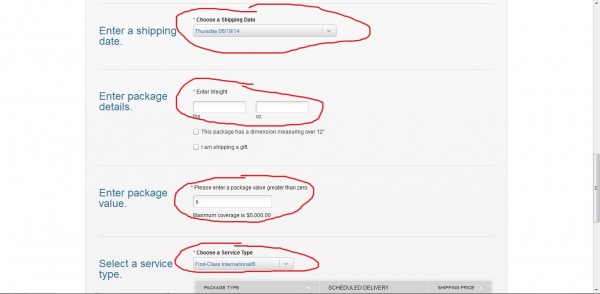
Make sure you select the date you’re going to mail, if it’s not going to be that same day. Always round up your package weight (better to err on the side of caution than have it sent back!). For a package value, the price the buyer paid (before fees/shipping) or retail value is a good option. I do not recommend undervaluing the package, and I do not recommend selecting that you’re shipping a gift. If you made a sale, then it isn’t a gift. ;)
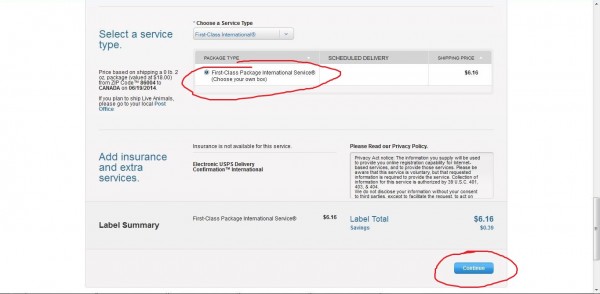
Select First Class International as the shipping method. The speed and expense of Priority Mail is generally unnecessary unless the buyer specifically requests it. First Class is usually about $6-10, while Priority is more like $25.
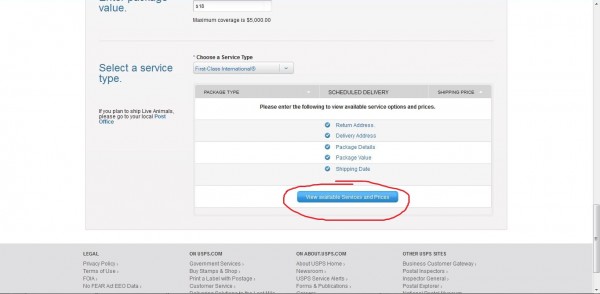
Click through…
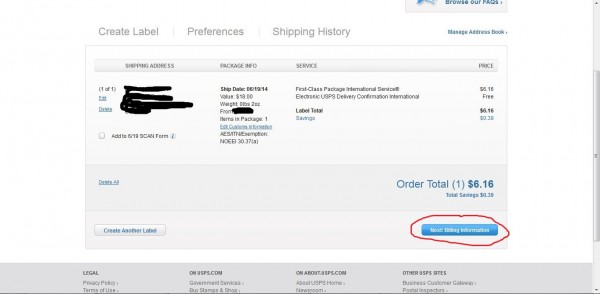
Make sure the radio button is selected, and continue. In the case of this example, the item was extremely light. This is basically the cheapest you’ll ever see for postage to Canada. Typically, it’s on the order of $7-$9 for something like a tank, crops, or shorts. Jackets, hoodies, and bags get pricier.
You’ve made it through the address and shipping info, now the next part is the customs information.
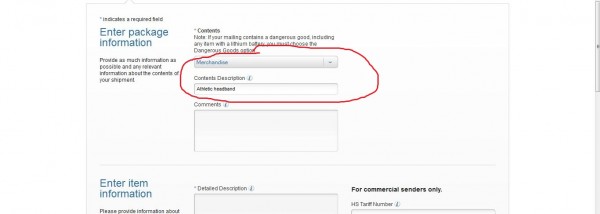
Select “merchandise” and enter a brief, basic comment. No need to say something like “lululemon cool racerback” or something like that. Generic is better.
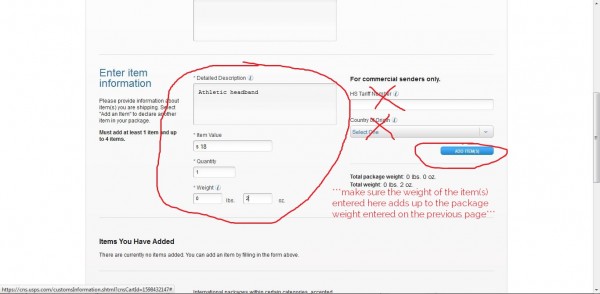
Enter the information indicated by the large red circle and click “add item”. No need to fill in the rest. Again, “detailed description” doesn’t have to get ultra-specific. “Yoga pants” is fine, no need to write out “lululemon size 6 beachscape wunder under pants”.
As written on the screen shot, when you add an item to the package, you need to make sure the total weight of the items you add should be the same as the total weight of the package. So if you put the package weight as 4 oz, then the shorts you’re mailing should be entered as 4 oz. If the weight of the contents doesn’t add up to the weight of the package, the website will get angry at you and you’ll have to go back and fix it.
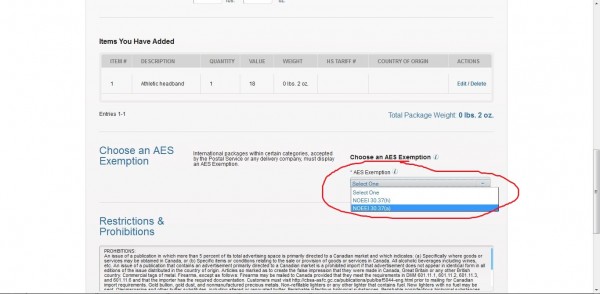
At the top of the screenshot, you can see what it looks like now that an item has been added to the package. The red circle indicates where you select your AES exemption for customs–basically, the category of the shipment. Choose NOEEI 30.37(a). I don’t recommend marking the (h) exemption as this is for gifts, and as I said above, sales transactions aren’t gifts.
And that’s all the customs there is! Hooray! Click through to the next page…
You’re all done with this label. If you have another package to mail, go ahead and create another label before you pay. When you’re done with your labels, go through to billing info.
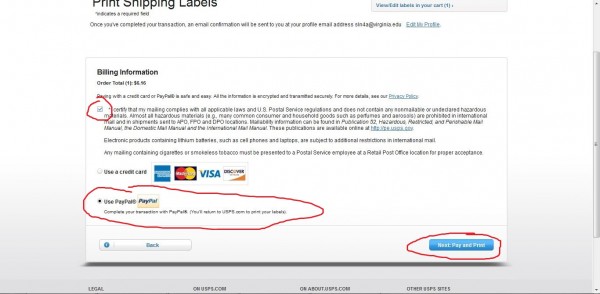
Check the box to certify that you’re not mailing anything weird (and if you are, go to your PO!). Although you can use a credit card to pay, it’s the most simple to pay with PayPal, since this is probably how the buyer paid you for the transaction anyway. You’ll be directed to PayPal to verify your password, then you’ll return to the USPS page:
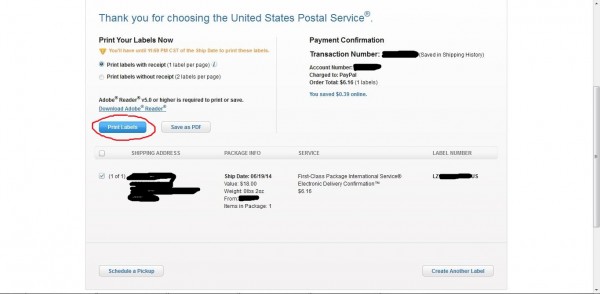
Print your label! Before I had a functioning printer at home, I would use the “save as PDF” and either email it to myself or take the file on a USB drive to the library and print there for like 5 cents.
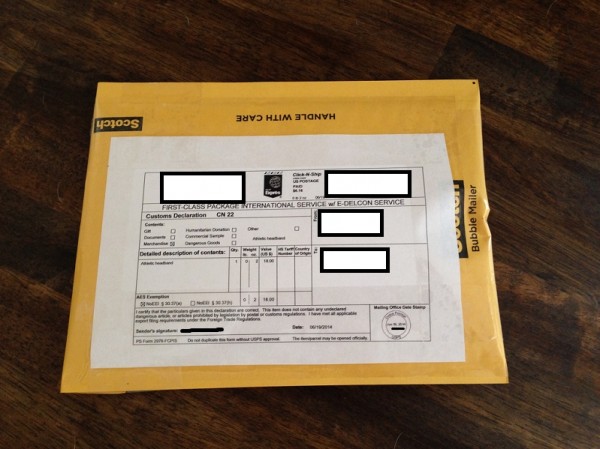
This is your label. Postage, customs, the whole shebang. You only need to attach this portion.
All taped up and ready to go!
I always take my Canada-bound packages into the post office and had them to a real person, but some people drop them in the blue USPS drop boxes to save time. By handing them to a real person, you can be sure that the tracking is scanned (so long as you watch the clerk and make sure they do it, anyway).
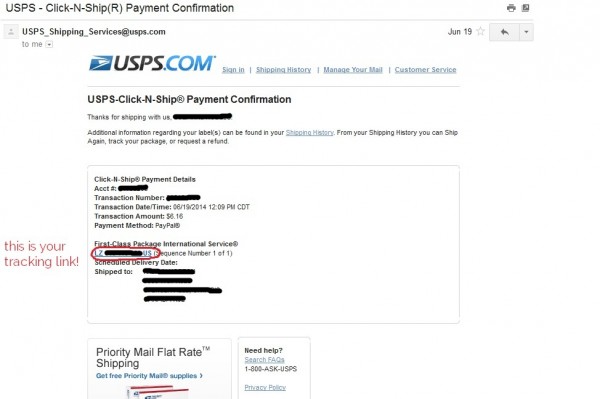
You’ll get an email that looks like this once you have paid. The link circled is your tracking link. Send the link to your buyer! Hold onto the email so that you can make sure the item is delivered. If you lose the email, you can also find the tracking through your transaction history on your USPS account. Note that once the package crosses the border, you can use the same tracking number to track the package on Canada Post’s website.
So there you go, all done! That wasn’t so bad, was it?

